How to Fix iPhone 7P Won't Turn On Failure Repair
A damaged iPhone 7 Plus need to be repaired, the fault described is that the iPhone 7 Plus won't turn on. First we need to connect it to DC power supply with iPhone lightning cable to test the iPhone charging current, the current jumps around 200mA, not stable. The computer can't identify the iPhone when it is connected, and it doesn't boot.
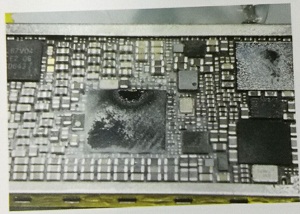
Nest we need to disassemble iPhone to detect. Use phone opening tools to tear down the iPhone, and then remove the iPhone motherboard. Measure the iPhone motherboard with Fluke 15B+ Digital Multimeter, there is no current, which means no leakage. Trigger it and it shows large current, the current up to 1.9A. Now, apply some rosin on iPhone logic board, and then use QUICK 861DW hot air rework station to heat it, it's turning white.
Picture 17-8-1
It's frustrating to see this, did the iPhone main power break down? Open the WUXINJI Dongle to check iPhone bitmap, we found the iPhone Nand flash power also was in the hot spot, first we need to measure the iPhone Nand flash to check if it is short circuit. After measurement, the iPhone Nand flash is short circuit.
Picture 17-8-2
Now, scrape out the iPhone Nand flash around the tape of the power supply large capacitor, and then apply rosin on it, adjust the ammeter to 3 V and heating this circuit by QUICK 861DW hot air rework station, this capacitor is short circuit, remove it. Picture 17-8-3
Measure the iPhone again, the data tested is normal. Put it on the activation board and add some power, and then turn on iPhone, the iPhone turned on successfully.
Tips: If you want to learn more about fixing the phone's faults, or want to buy some high-quality mobile phone repair tools and equipment, I will recommend a high quality and low price shop - One-stop repair tool shop VIP Pro Shop Team.


Comments
Post a Comment